Showing posts with label SCVMM 2012 R2. Show all posts

Tuesday, July 28, 2015

Re-associate orphaned virtual machine with its VM role in System Center 2012 R2 with Update Rollup 7

If you have been using Azure Pack and the VM Cloud Provider, you have most likely been tempted to use the concept of VM Roles too.

VM Roles is a powerful technology that makes it possible for you to provide a lot more than just a sysprep’d operating system to your tenants. Through a resource extension, a VM Role can be deployed with any application you’d like, ready to go for the tenants.

However, there has been some challenges since the release of Azure Pack and VM Roles.
Some of the challenges has been related to Azure Pack directly, and some of the challenges has been related to Virtual Machine Manager.
I won’t cover everything here, but the following picture should summarize some of the challenges of a VM Role and a stand-alone VM, where some parts such as “static disk” wasn’t enabled for VM Roles before UR5. With UR6, we also got support for Gen2 VMs as part of the VM Roles.


Also note that “backup” and “DR” on VM Role is categorized as a “no go”.

Luckily and as usual, David and his great team at Microsoft has listened to our feedback – and with Update Rollup 7 for Virtual Machine Manager 2012 R2, we are now able to re-associate a VM Role!

Background:

A couple of months ago, I reached out to the VMM team through David Armour and explained a rather bad situation for him that one of my customer suddenly was in the middle of.
It turned out that several of my MVP friends also had experienced similar issues and this was becoming a critical issue for those customers. Here’s some details around the problem we saw:

In the case of some underlying storage issues in the cloud environment, many of the virtual machines that was running in VMM, SPF and Azure Pack ended up in a pretty bad state, and the only way to solve it was to generate new IDs for those VMs.

Now, this sounds very tempting and applicable in certain scenarios. But given the fact that the VMs actually were part of a VM Role in Azure Pack, turned out to be a bad experience.
Once a VM is no longer associated with the VM Role in WAP, it will appear as a stand-alone VM with no way for you to perform advanced operations through the tenant portal. The VM Role itself will appear as an orphaned object.

Our biggest challenge in this satiation was:

1)      There was no way to re-associate a VM instance with a VM role once this relationship was broken (so Remove-SCVirtualMachine with –Force parameter was not an option)
2)      If we could re-associate with a VM role (once the VM appeared in VMM again with new ID), the usage would be broken for that VM. Yes the customer was actually using the usage API in WAP to charge their tenants.

For this customer the issue was most likely caused by some underlying storage problems. However, you could easily end up in a similar situation by using native Microsoft technologies such as backup/restore and DR through Hyper-V Replica/ASR. Or simplier, by removing and adding a host/cluster to a VMM Cloud

With Update Rollup 7, we have finally support for re-associate both an orpahned VM from a VM Role and a Service Template deployment.

Example of a PowerShell cmdlet that will join an orphaned virtual machine to a VM Role:

$myvm = Get-SCVirtualMachine –Name “KN01”
$myVMRole = Get-CloudResource –Name “mywebservice”
Join-SCVirtualMachine –VM $myvm –VMRole $myVMRole

For more information, please read the following KB:


Thursday, April 30, 2015

VM Checkpoints in Windows Azure Pack

Fresh from the factory, Update Rollup 6 has been released and shipped by Microsoft.

This isn’t a blog post that will point out all the bug fixes and the amazing work all of the teams has been doing, but rather point you towards a highly requested feature, that finally made its way to the tenant portal in Windows Azure Pack.

With Update Rollup 6, we now supports creation and restore of Hyper-V checkpoints on virtual machines, provided by the VM Cloud Resource Provider.

Tenants that have deployed virtual machines may now create checkpoints and restore them on their own, without any interaction from the cloud provider.

Let us have a closer look at how this actually works, how to configure it and what additional steps you might want to take as part of this implementation.

Enabling create, view and restore of virtual machine checkpoints at the Hosting Plan level

Once the UR6 is installed for WAP and the underlying resource provider, you will notice some changes in the admin portal.

First, navigate to a Hosting Plan of yours – that contains the VM Cloud Resource Provider.
When you scroll down, you can see that we have some settings related to checkpoints.


Create, view and restore virtual machine checkpoints – will let the tenants that has subscriptions based on this hosting plan, be able to perform these actions on their virtual machines.

View and restore virtual machine checkpoints – let the tenants view and restore virtual machine checkpoints, but not create them. This can for example be performed by the cloud provider on an agreed schedule.

When you enable either of these options, an update job is taking place at the plan level and communicates the changes back to VMM, ensuring that the tenants will have permissions to take these actions in the tenant portal once it has completed.


If we switch over to the tenant portal, we can see that when we drill into one of the existing VMs (click on the VMàDashboard) we have some new actions available.


If you would manage checkpoints for your VM Roles, you can of course do that too, but you then have to drill into each specific instance, as the VM role potentially can have multiple instances when supporting scale-out.


To create a new checkpoint, simply click on Checkpoint and type the name of the checkpoint and eventually a description.


If we switch back to the fabric and VMM, we can see that a VMM job has completed with details about the checkpoint process for this specific tenant, with the name and description we typed.


If we would like to perform the same operation again, creating an additional checkpoint on the same virtual machine, we get a message telling us that the existing checkpoint will be deleted.


This is because that the current checkpoint integration in WAP will only keep one checkpoint, and avoid the scenario where you could potentially have a long chain of differential disks.

When we create the second checkpoint, we can switch back to VMM to see what’s actually happening:

First, a new checkpoint is created.
Second, the previous checkpoint is deleted.


When we explore the checkpoints settings on the VM itself afterwards, we see that we only have the latest checkpoint listed.


Regarding the restore process, we can also perform this from the same view in the tenant portal.
Once you click on the restore button, the tenant portal will show you the metadata of the available checkpoint, such as name, description and when it was created. Once you click the confirm button, the restore process will start in VMM.


Now what?

If you are familiar with how checkpoints in Hyper-V works, then you know that each static disk will  be either .vhd or .vhdx – depending on the format you are using (.vhdx was introduced with Windows Server 2012 and should be the preferred format, but Azure is still using .vhd).
Once you create a checkpoint, a new disk (.avhd or .avhdx) will be created– a differential disk, containing all the new write operations, while read operations will occur on both the parent disk (vhdx) and the newly created differential disk. 


To summarize, this might not be an ideal situation when it comes to performance, life-cycle management and storage optimization.

Since we don’t have any action in the tenant portal to perform a delete operation, this can be scary in some scenarios.
The fact that the VM will always run on a checkpoint once a checkpoint is created, means you will always be able to restore to your latest checkpoint from the portal.

In order to solve this challenge, we can leverage the integration of Service Management Automation in Azure Pack.
One of the best things with Azure Pack and the VM Cloud resource provider, is that we can extend it and create valued added solutions and services by linking certain actions happening in the tenant portal, to automated tasks that are executed by a SMA runbook in the backend.

The following screenshot shows that there’s an event related to creation of VMM Checkpoints performed by the tenant, which can easily be linked to a runbook.


Here’s an example of a runbook that will check for checkpoints created on VMs belonging to a specific VMM Cloud that is used in a Hosting Plan in WAP. If there’s any checkpoints that exists, they will be deleted and the VMs will have their disks merged back to a static disk (.vhd/.vhdx).
<#
   
.SYNOPSIS
Wokflow to check for - and eventually delete old VM checkpoints
  #> 

 workflow delete-scvmcheckpoint  
    # Connection to access VMM server. 
  
    $VmmConnection = Get-AutomationConnection -Name 'SCVMM'  
    $VmmServerName = $VmmConnection.ComputerName  
    
    inlinescript
{  

 # Import VMM module. 
Import-Module virtualmachinemanager  
         
# Connect to VMM server. 
Get-SCVMMServer -ComputerName $Using:VmmServerName  

$vms = Get-SCVirtualMachine | Where-Object {$_.Cloud -like "*Copenhagen IaaS*" -and  $_.VMCheckpoints }
      
       foreach ($vm in $vms)
    {
      
Get-SCVMCheckpoint -VM $vm | Remove-SCVMCheckpoint -RunAsynchronously
            
    }   

}-PSComputerName $VmmServerName -PSCredential $VmmCredential 

This simple code can so be added to a schedule that will execute this runbook on a daily basis – as an example, ensuring that no VMs in the cloud will run on a checkpoint on a long term.

Thanks for reading!


Monday, March 16, 2015

Application Modeling with VM Roles, DSC and SMA

Earlier this year, I started to go deep into DSC to learn more about the concept, possibilities and most important, how we can improve what we already have and know, using this new approach of modeling.

For more information and as an introduction to this blog post, you can read my former blog post on the subject: http://kristiannese.blogspot.no/2015/03/dsc-with-azure-and-azure-pack.html

Desired State Configuration is very interesting indeed – and to fully embrace it you need to be comfortable with Powershell. Having that said, Desired State Configuration can give you some of what you are requiring today, but not everything.

Let me spend some minutes trying to explain what I am actually saying here.

If you want to use DSC as your primary engine, the standard solution to configure and deploy applications and services across clouds throughout the life cycle, there is nothing there to stop you from doing so.
However, given the fact that in many situations, you won’t be the individual who’s ordering the application, server and dependencies, it is important that we can make this available in a world full of tenants with a demand for self-servicing.

Looking back at how we used to do things before to handle the life-cycle management of applications and infra, I think it is fair to say it was something like this (in context of System Center):

1)      We deployed a Virtual Machine based on a VM Template using SCVMM
We either
a)      Manually installed and configured applications and services within the guest post VM deployment
b)      Used SCCM to install agents, letting the admin interact with the OS to install and configure applications using a central management solution
2)      If we wanted to provide monitoring, we then used SCOM to roll out the agents to our servers and configured them to report to their management group
3)      Finally yet importantly, we also wanted to be secure and have a reliable set of data. That’s why we also added backup agents to our servers using SCDPM

In total, we are talking about 4 agents here (SCVMM, SCCM, SCOM and SCDPM).
That is a lot.

Also note that I didn’t specify any version of System Center, so this was probably even before we started to talk about Private Clouds (introduced with System Center 2012).

And that’s the next topic, all of this in the context of cloud computing.

If we take a walk down the memorial lane, we can see some of Microsoft’s least proud moments, all the attempts in order to bring the private cloud a fully functional self-service portal.

-        We’ve had several self-service portals for VMM that later was replaced by different solutions, such as Cloud Service Process Pack and App Controller
-        Cloud Service Process Pack – which was introduced with SC 2012 – where all the components were merged into a single license, giving you out-of-the-box functionality related to IaaS.
The solution was one of the worst we have seen, and the complexity to implement it was beyond what we have seen ever since.
-        AppController was based on Silverlight and gave us the “single-pane of glass” vision for cloud management. With a connector to Azure subscriptions (IaaS) and to private and service provider clouds (using SPF), you could deploy and control your services and virtual machines using this console

Although it is common knowledge that AppController will be removed in vNext of System Center (https://technet.microsoft.com/en-us/library/dn806370.aspx?f=255&MSPPError=-2147217396 ), AppController introduced us to a very interesting thing: self-service of service templates.

The concept of service templates was introduced in System Center 2012 – Virtual Machine Manager, and if we go back to my list of actions we needed to perform, we could say that service templates at some point would replace the need of SCCM.
Service Templates was an extension to the VM template. It gave us the possibility to design, configure and deploy multi-tier applications – and deploy it to our private clouds.
However, I have to admit that back then; we did not see much adoption of service templates. Actually, we did not see some serious adoption before Microsoft started to push some pre-configured service templates on their own, and that happened last year – at the same time as their Gallery Items for Azure Pack was released.

To summarize, the service template concept (which was based on XML) gave the application owners and the fabric administrators a chance to interact to standardize and deploy complex applications into the private clouds, using AppController. In the same sentence there we found AppController (Silverlight) and XML.

If we quickly turn to our “final destination”, Microsoft Azure, we can see that those technologies aren’t the big bet in any circumstances.

VM Roles are replacing service templates in the private cloud through Windows Azure Pack.

A VM Role is based on JSON – and define a virtual machine resource that tenants can instantiate and scale according to their requirements.

We have in essence two JSON files. One for the resource definition (RESDEF) and one for the resource extension (RESEXT).
The resource definition describes the virtual machine hardware and instantiation restrictions, while the resource extension definition describes how a resource should be provisioned.

In order to support user input in a user friendly way, we also have a third JSON file – the view definition (VIEWDEF), which provides the Azure Pack details about how to let the user customize the creation of a VM Role.

These files are contained in a package, along with other files (custom resources, logo’s etc) that describe the entire VM Role.

You might ask yourself why I am introducing you to something you already know very well, or why I am starting to endorse JSON. The answer lays in the clouds.

If you have every played around with the Azure preview portal, you have access to the Azure Resource Manager.
ARM introduced an entirely new way of thinking about you resources. Instead of creating and managing individual resources, you are defining a resource model of your service – to create a resource group with different resources that are logically managed throughout the entire life cycle.

-        And guess what?

The Azure Resource Manager Templates is based on JSON, which describes the resources and associated deployment parameters.

So to give you a short summary so far:

Service Templates was great when it came with SCVMM 2012. However, based on XML and AppController for self-service, it wasn’t flexible enough, nor designed for the cloud.

Because of a huge focus on consistency as part of the Cloud OS vision by Microsoft, Windows Azure Pack was brought on-premises and should help organizations to adopt the cloud at a faster cadence. We then got VM Roles that should be more aligned with the public cloud (Microsoft Azure), compared to service templates.

So we might (so far) end up with a conclusion that VM Roles is here to stay, and if you are focusing too much on service templates today, you need to reconsider that investment.

The good, the bad and the ugly

So far, the blog post has been describing something similar to a journey. Nevertheless, we have not reached the final destination yet.

I promised you a blog post about DSC, SMA and VM Roles, but so far, you have only heard about the VM Roles.
Before we proceed, we need to be completely honest about the VM Roles to understand the requirement of engineering here. To better understand what I am talking about, I am comparing a VM Role with a stand-alone VM based on a VM Template:


As you can see, the VM Role gives us very much more compared to a stand-alone VM from a VM template. A VM Role is our preferred choice when we want to deploy applications in a similar way as a service template, but only as single tiers. We can also service the VM Role and scale it on demand.

A VM on the other hand, lacks all these fancy features. We can purely base a stand-alone VM on a VM Template, giving us a pre-defined HW template in VMM with some limited settings at the OS level.
However, please note that the VM supports probably the most important things for any production scenarios: backup and DR.
That is correct. If you use backup and DR together with a VM Role, you will end up in a scenario where you have orphaned objects in Azure Pack. This will effectively break the relationship between the VM Role (CloudService in VMM) and its members. There is currently no way to recover from that scenario.

This got me thinking.

How can we leverage the best from both worlds? Using VM Role as the engine that drives and creates the complexity here, supplemented by SMA and Desired State Configuration to perform the in-guest operations into normal VM templates?

I ran through the scenario with a fellow MVP, Stanislav Zhelyazkov and he nodded and agreed. “-This seems to be the right thing to do moving forward, you have my blessing” he said.


The workflow

This is where it all makes sense. To combine the beauty of VM Roles, DSC and SMA to achieve the following scenario:

1)      A tenant logs on to the tenant portal. The subscription includes the VM Cloud resource provider where the cloud administrator has added one or more VM Roles.
2)      The VM Role Gallery shows these VM Roles and provides the tenant with instructions on how to model and deploy the application.
3)      The tenant provides some input during the VM Role wizard and the VM Role deployment starts
4)      In the background, a parent runbook (SMA) that is linked to the event in the portal kicks in, and based on the VM Role the tenant chose, it will invoke the correct child runbook.
5)      The child runbook will deploy the (stand-alone) VMs necessary for the application specified in the VM Role, join them to the proper domain (if specified) and automatically add them to the tenant subscription.
6)      Once the stand-alone VMs are started, the VM Role resource extension kicks in (which is the DSC configuration, using push) that based on the parameters and inputs from the tenant is able to deploy and model the application entirely.
7)      Once the entire operation has completed, the child runbook will clean-up the VM Role and remove it from the subscription


In a nutshell, we have achieved the following with this example:

1)      We have successfully been able to deploy and model our applications using the extension available in VM Roles, where we are using Desired State Configuration to handle everything within the guests (instead of normal powershell scripts).
2)      We are combining the process in WAP with SMA Runbooks to handle everything outside of the VM Role and the VMs.
3)      We are guaranteed a supported life-cycle management of our tenant workloads
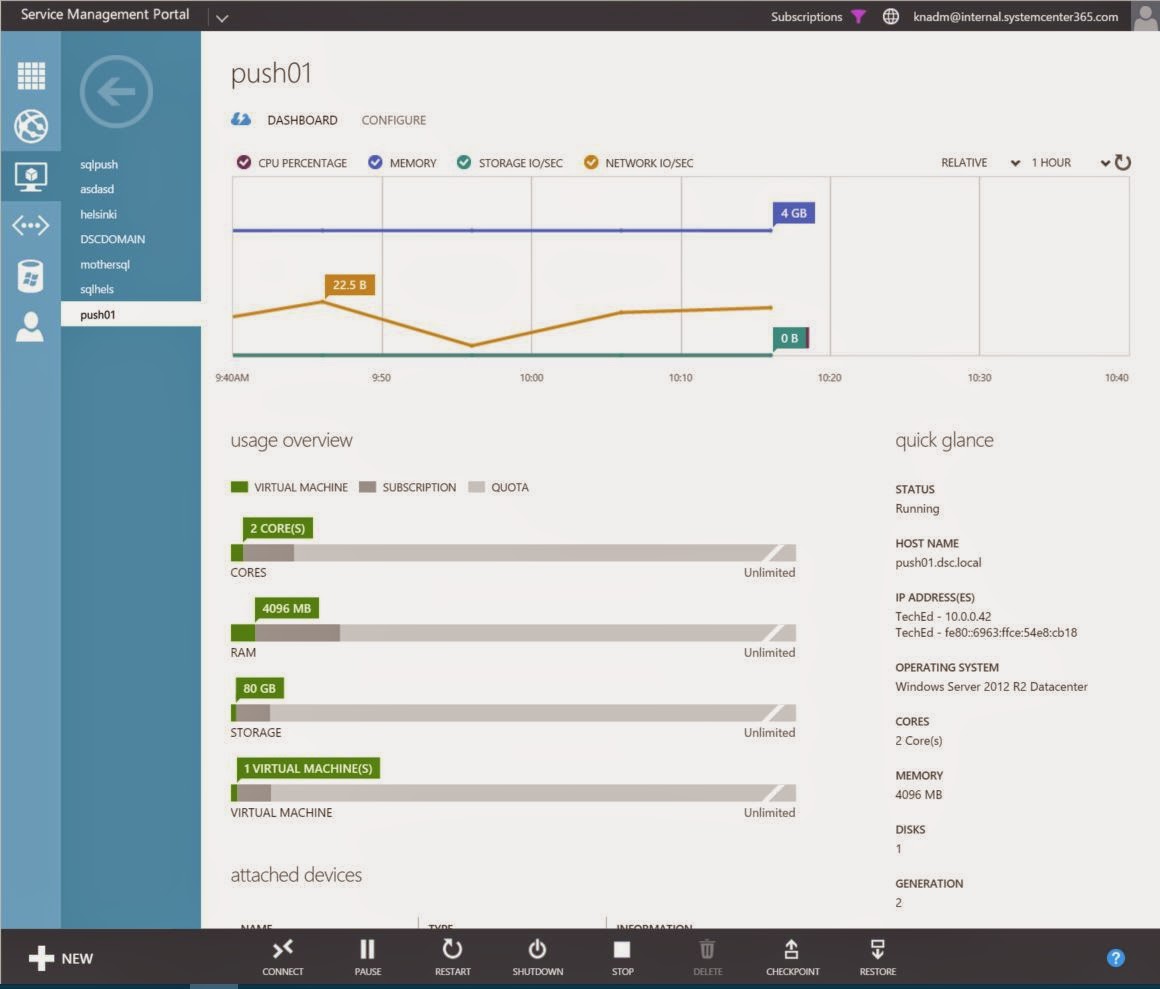
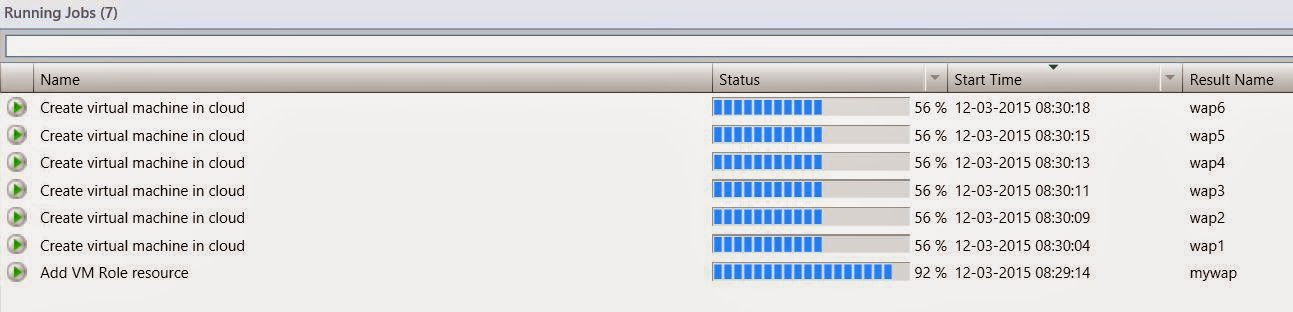
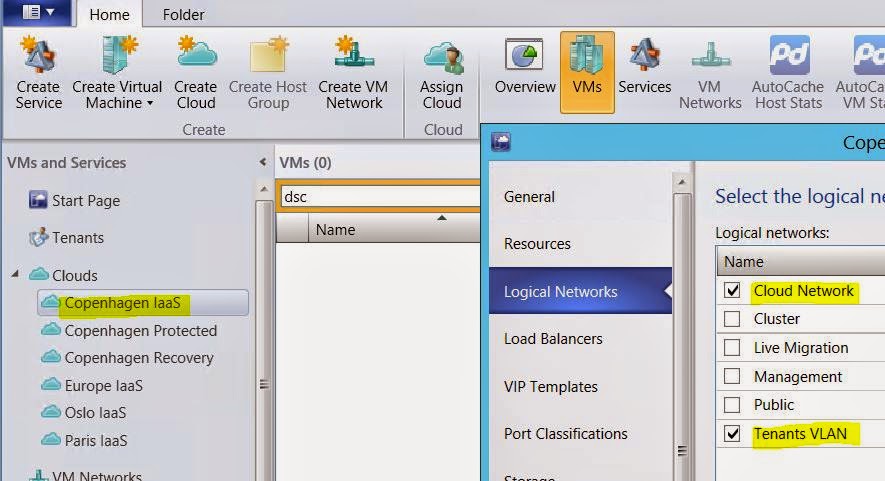

Here you can see some screenshots from a VM Role that will deploy Windows Azure Pack on 6 stand-alone VMs, combining DSC and SMA.


In an upcoming blog post, we will start to have a look at the actual code being used, the challenges and workarounds.


I hope that this blog post showed you some interesting things about application modeling with VM Roles, SMA and DSC, and that the times are a-changing compared to what we used to do in this space.

Monday, February 23, 2015

When your WAPack tenants are using VLANs instead of SDN

When your tenants are using VLANs instead of SDN

Ever since the release of Windows Azure Pack, I’ve been a strong believer of software-defined datacenters powered by Microsoft technologies. Especially the story around NVGRE has been interesting and something that Windows Server, System Center and Azure Pack are really embracing.

If you want to learn and read more about NVGRE in this context, I recommend having a look at our whitepaper: https://gallery.technet.microsoft.com/Hybrid-Cloud-with-NVGRE-aa6e1e9a

Also, if you want to learn how to design a scalable management stamp and turn SCVMM into a fabric controller for your multi-tenant cloud, where NVGRE is essential, have a look at this session: http://channel9.msdn.com/Events/TechEd/Europe/2014/CDP-B327

The objective of this blog post is to:

·        Show how you should design VMM to deliver – and use dedicated VLANs to your tenants
·        Show how to structure and design your hosting plans in Azure
·        Customize the plan settings to avoid confusion

How to design VMM to deliver – and use dedicated VLANs to your tenants

Designing and implementing a solid networking structure in VMM can be quite a challenging task.
We normally see that during setup and installation of VMM, people don’t have all the information they need. As a result, they have already started to deploy a couple of hosts before they are actually paying attention to:
1)      Host groups
2)      Logical networks
3)      Storage classifications
Needless to say, it is very difficult to make changes to this afterwards when you have several objects in VMM with dependencies and deep relationship.

So let us just assume that we are able to follow the guidelines and pattern I’ve been using in this script:

The fabric controller script will create host groups based on physical locations with child host groups that contains different functions.
For all the logical networks in that script, I am using “one connected network” as the network type.


This will create a 1:Many mapping of the VM network to each logical network and simplify scalability and management.

For the VLANs networks though, I will not use the network type of “one connected network”, but rather use “VLAN-based independent networks”.

This will effectively let me create a 1:1 mapping of a VM network to a specific VLAN/subnet within this logical network.

The following screenshot shows the mapping and the design in our fabric.


Now the big question: why VLAN-based independent network with a 1:1 mapping of VM network and VLAN?

As I will show you really soon, the type of logical network we use for our tenant VLANs gives us more flexibility due to isolation.

When we are adding the newly created logical network to a VMM Cloud, we simply have to select the entire logical network.
But when we are creating Hosting Plans in Azure Pack admin portal/API, we can now select the single and preferred VM Network (based on VLAN) for our tenants.

The following screenshot from VMM shows our Cloud that is using both the Cloud Network (PA network space for NVGRE) and Tenants VLAN.


So once we have the logical network enabled at the cloud level in VMM, we can move into the Azure Pack section of this blog post.

Azure Pack is multi-tenant by definition and let you – together with VMM and the VM Cloud resource provider, scale and modify the environment to fit your needs.

When using NVGRE as the foundation for our tenants, we are able to use Azure Pack “out of the box” and have a single hosting plan – based on the VMM Cloud where we added our logical network for NVGRE, and tenants can create and manage their own software-defined networks. For this, we only need a single hosting plan as every tenant is isolated on their own virtualized network.
Of course – there might be other valid reasons to have different hosting plans, such as SLA’s, VM Roles and other service offerings. But for NVGRE, everyone can live in the same plan.

This changes once you are using VLANs. If you have a dedicated VLAN per customer, you must add the dedicated VLAN to the hosting plan in Azure Pack. This will effectively force you to create a hosting plan per tenant, so that they are not able to see/share the same VLAN configuration.

The following architecture shows how this scales.


In the hosting plan in Azure Pack, you simply add the dedicated VLAN to the plan and it will be available once the tenant subscribe to this subscription.


Bonus info:

With the update rollup 5 of Azure Pack, we have now a new setting that simplifies the life for all the VLAN tenants out there!

I’ve always said that “if you give people too much information, they’ll ask too many questions”.
It seems like the Azure Pack product group agree on this, and we have now a new setting at the plan level in WAP that says “disable built-in network extension for tenants”.


So let us see how this looks like in the tenant portal when we are accessing a hosting plan that:

a)      Provides VM Clouds
b)      Has the option “disable built-in network extension for tenants” enabled


This will ease on the confusion for these tenants, as they were not able to manage any network artefacts in Azure Pack when VLAN was used. However, they will of course be able to deploy virtual machines/roles into the VLAN(s) that are available in their hosting plan.


Sunday, February 15, 2015

SCVMM Fabric Controller - Update: No more differential disks for your VM Roles

I just assume that you have read Marc van Eijk's well described blog post about the new enhancement with Update Rollup 5 for SCVMM, where we can now effectively turn off differential disks for all our new VM Role deployments with Azure Pack.

If not, follow this link to get all the details: http://www.hyper-v.nu/archives/mvaneijk/2015/02/windows-azure-pack-vm-role-choose-between-differencing-disks-or-dedicated-disks/

As a result of this going public, I have uploaded a new version of my SCVMM Fabric Controller script, that now will add another custom property to all the IaaS Clouds in SCVMM, assuming you want static disks to be default.

You can grab the new version from here:

https://gallery.technet.microsoft.com/SCVMM-Fabric-Controller-a1edf8a7

Next, I will make this script a bit more user friendly and add some more functionality to it in the next couple of weeks.

Thanks.

-kn


Monday, February 2, 2015

Sharing VNet between subscriptions in Azure Pack

Sharing VNet between subscriptions in Azure Pack


From time to time, I get into discussions with customers on how to be more flexible around networking in Azure Pack.

Today each subscription is a boundary. Meaning, a co-admin can have access to multiple subscriptions, but you are not allowed to “share” anything between those subscriptions, such as virtual networks.

So here’s the scenario.

A tenant subscribes to multiple subscriptions in Azure Pack. Each subscription is based on its associated Hosting Plan, which is something that is defined and exposed by the service administrator (the backend side of Azure Pack). A Hosting Plan can contain several offerings, such as VM Clouds, web site Clouds and more. The context as we move forward is the VM Cloud.

Let us say that a customer has two subscriptions today. Each subscription has their own tenant administrator.

Subscription 1 is associated with Hosting Plan 1, which offers standard virtual machines based on VM templates.

Subscription 2 is associated with Hosting Plan 2, which offers VM Roles through Gallery Items.

The service provider has divided these offerings into two different plans.

Tenant admin 1 has created his VNet on subscription 1 and connected the virtual machines.
However, tenant admin 2 creates a new VNet on subscription 2 and connect his VM Roles, they are not able to communicate with the VMs on subscription 1.

So what do we do?

As this isn’t something we are exposing through the GUI nor the API, we have to get in touch with the service admin itself.

You have already noticed that we are dealing with two tenants here, so that should give you an indication on what we are about to do. We are going to share some resources in the backend.

If we head over to SCVMM and look at the VM Network in Powershell, a few interesting properties are appearing to the surface.


UserRole which says this is associated with a UserRole in SCVMM, which can be generated by Azure Pack and aggregated through SPF.
Owner which is owning the VM network in SCVMM.
GrantedToList which is obviously where we can allow other UserRoles to have access to this object.

Interesting.

This means that the service admin can help their tenants with the following.

Grant access to tenant admin 2 on the VNet that was created on subscription 1 – by tenant admin 1.

Powershell cmdlets:

### Find the VM network you want to share between subscriptions

$VNet = Get-SCVMNetwork | Where-Object {$_.name -eq "TechEd" -and $_.Owner -eq "knadm@internal.systemcenter365.com"}

### Find the tenant admin for that subscription

$tenant = Get-SCUserRole | Where-Object {$_.Name -like "*kristine*"}

### Grant access

Grant-SCResource -Resource $VNet -UserRoleID $tenant.ID -RunAsynchronously


We have now enabled the following scenario:


Ok, so what is next?

You can now access the tenant portal and deploy your workloads.

In the portal, you will never be able to manage the VNet on this subscription, only deploy workloads that are connected to it.


Tuesday, December 30, 2014

SCVMM Fabric Controller Script – Update

Some weeks ago, I wrote this blog post (http://kristiannese.blogspot.no/2014/12/scvmm-fabric-controller-script.html ) to let you know that my demo script for creating management stamps and turning SCVMM into a fabric controller is now available for download.

I’ve made some updates to the SCVMM Fabric Controller script during the Holidays – and you can download the Powershell script from TechNet Gallery:


In this update, you’ll get:

More flexibility
Error handling
3 locations – which is the level of abstraction for your host groups. Rename these to fit your environment.
Each location contain all the main function host groups, like DR, Edge, IaaS and Fabric Management
Each IaaS host group has its corresponding Cloud
Native Uplink Profile for the main location will be created
A global Logical Switch with Uplink Port profile and Virtual Port Profiles will be created with a default virtual port profile for VM Roles
Custom property for each cloud (CreateHighlyAvailableVMRoles = true) to ensure HA for VM roles deployed through Windows Azure Pack

Please note, that you have to add hosts to your host groups before you can associate logical networks with each cloud created in SCVMM, so this is considered as a post deployment task.

I’ve received some questions since the first draft was uploaded to TechNet Gallery, as well as from my colleagues who have tested the new version:

·         Is this best practice and recommendation from your side when it comes to production design for SCVMM as a fabric controller?

Yes, it is. Especially now where the script more or less create the entire design.
If you have read our whitepaper on Hybrid Cloud with NVGRE (Cloud OS) (https://gallery.technet.microsoft.com/Hybrid-Cloud-with-NVGRE-aa6e1e9a ), then you can see that we are following the same principals there – which helped us to democratize software-defined networking for the community.

·         I don’t think I need all the host groups, such as “DR” and “Edge”. I am only using SCVMM for managing my fabric

Although SCVMM can be seen as the primary management tool for your fabric – and not only a fabric controller when adding Azure Pack to the mix, I would like to point out that things might change in your environment. It is always a good idea to have the artifacts in place in case you will grow, scale or add more functionality as you move forward. This script will lay the foundation for you to use whatever fabric scenario you would like, and at the same time keep things structured according to access, intelligent placement and functionality. Changing a SCVMM design over time isn’t straightforward, and in many cases you will end up with a “legacy” SCVMM design that you can’t add into Windows Azure Pack for obvious reasons.


Have fun and let me know what you think.

Sunday, December 14, 2014

SCVMM Fabric Controller Script

We are reaching the holidays, and besides public speaking, I am trying to slow down a bit in order to prepare for the arrival of my baby girl early in January.

However, I haven’t been all that lazy, and in this blog post I would like to share a script with you.

During 2014, I have presented several times on subjects like “management stamp”, “Windows Azure Pack”, “SCVMM” and “Networking”.

All of these subjects have something in common, and that is a proper design of the fabric in SCVMM to leverage the cloud computing characteristics that Azure Pack is bringing to the table.
I have been visiting too many customers and partners over the last months just to see that the design of the fabric in VMM is not scalable or designed in a way that gives some meaning at all.

As a result of this, I had to create a Powershell script that easily could show how it should be designed, based on one criteria: turning SCVMM into a universal fabric controller for all your datacenters and locations.

This means that the relationship between the host groups and the logical networks and network definitions need to be planned carefully.
If you don’t design this properly, you can potentially have no control over where the VMs are deployed. And that is not a good thing.

This is the first version of this script and the plan is to add more and more stuff to it once I have the time.

The script can be found at downloaded here:


Please note that this script should only be executed in an empty SCVMM environment (lab), and you should change the variables to fit your environment.

Once the script has completed, you can add more subnets and link these to the right host groups.

The idea with this version is really just to give you a better understanding of how it should be designed and how you can continue using this design. 


Wednesday, December 3, 2014

Setting Static IP Address on a VM Post Deployment

This short blog post is meant to show you how you can grab an IP address from a VMM IP pool for your virtual machines post deployments.

Recently, I found out that during specific DR scenarios with ASR (E2E), you have to use static IP addresses for some of your VMs, depending on the actual recovery plan you have created (but that is a different blog post).

In order to allocate an IP address from the VMM IP Pool, you can use the following lines of powershell:

$vm = Get-ScvirtualMachine -Name “NameOfVM"
$staticIPPool = Get-SCStaticIPAddressPool -Name "NameOfIPPool"
Grant-SCIPAddress -GrantToObjectType "VirtualNetworkAdapter" -GrantToObjectID $vm.VirtualNetworkAdapters[0].ID -StaticIPAddressPool $staticIPPool
Set-SCVirtualNetworkAdapter -VirtualNetworkAdapter $vm.VirtualNetworkAdapters[0] -IPv4AddressType static

Check the job view in VMM to see which IP is allocated to the vNIC on the VM and ensure that these settings are reflected within the guest operating system as well.