Tuesday, October 26, 2010

Failover Cluster Manager, SCVMM, and Hyper-V Manager

In today’s HA environments, you are able to administer your VMs from SCVMM, Failover Cluster Manager, and off course, - Hyper-V Manager.

What is the pros and cons here, and how do they affect each other?

Let`s start with a brief overview of them:
Hyper-V manager


This console lets you do the following:
Create new VMs, edit VMs, administer your Virtual Networks, import/export VMs, and much more.
It also allows you to add additional Hyper-V servers in your network.

Failover Cluster Manager
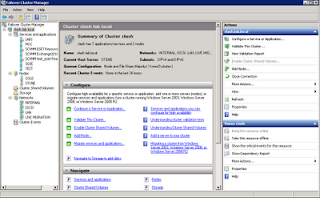

With this console, you achieve the same thing as you would with Hyper-V manager (without import/export, unless you start the Hyper-V manager within Failover Cluster Manager), and also create your VMs highly available. You also have the settings for each VM, as you have in the Hyper-V manager console.


System Center Virtual Machine Manager 2008 R2 (SCVMM)


With the SCVMM console, you are able to perform many of the same operations as you would in Failover Cluster Manager, which also includes the Hyper-V manager.
You simply add the host/cluster to your VMM server, and are able to deploy, convert, and manage your VMs.


So what do you need, and when?

If you`re running Hyper-V in a small environment with few hosts and for some reason do not use them in a Failover Cluster, this is the one you would like to use.
In addition, I should mention that you also could manage your stand-alone hosts with SCVMM as well, but we will look at the ‘requirements’ for using SCVMM later.
Hyper-V manager gives you the ability to manage your Hyper-V host, VMs, and every little detail here. It is a great console that every VM administrator should have in-depth knowledge of.

If you are using Hyper-V in a HA environment you would go for the Failover Cluster Manager.
There are many similarities here, but a few things to note.
IF you ever make changes to your VMs in Hyper-V Manager, you should refresh the configuration in Failover Cluster Manager.


This is important. Otherwise the settings of the virtual machine might not be up to date in your cluster, which could cause some problems during migration, failovers etc. of that clustered virtual machine

Guide to refresh configuration In Failover Cluster Manager:

  1.       Expand Services and Applications, and select your VM that you want to refresh the configuration
  2.       Right click your VM (as shown in the picture abve) and select ‘More Actions’, and click ‘Refresh virtual machine configuration’.
  3.       Click yes to see the report when this is done and check to see if there are any errors related to the update-job.

Let`s move on to SCVMM.
This is a great tool for managing your VM Environment, end to end. But, it may confuse you a bit.
First thing first: you have to remember that SCVMM is also a tool to manage your stand-alone Hyper-V hosts as well as your cluster. And the ‘automatic start - stop action’- option is based on the settings in Hyper-V manager. In a cluster, there will (or at least should) be a failover and that makes this an irrelevant setting. As long as you have the Auto Start enabled in the Failover Cluster, your VMs should restart if your entire cluster shuts down. SCVMM is a great tool if you need to run P2V, V2V, deploy VMs, and manage your entire virtual environment, end to end. But personally when it comes to Hyper-V in failover cluster, I rely on the Failover Cluster Manager. This is the console with the most accurate information, since SCVMM does not support every detail in failover cluster (like preferred node and so on, but hopefully it will in the near future

Wednesday, October 13, 2010

Basic Networking in Hyper-V

From time to time in the forums, people seem to have varying understanding about the different networks available in Hyper-V. So I will try to explain some basic things here.
We have three types of Virtual Networks:
-         External
This is the network you have to configure if you want your VMs to have access to your LAN and
internet. During the creation of the External Virtual Network in Hyper-V, you have to select one of your installed NICs on your parent, to function as a Virtual Switch for your VMs.
Best practice is to not enable ‘Allow management operating system to share this network adapter’ if
possible. This is for isolation, and you need minimum 2 NICs to skip this feature. (Else you wont be able to connect to your host)
-         Private
This is a logical network, and is isolated from everything. It only allows communication between VMs on the same private network, and it is not bound to a physical NIC adapter.
(Some people (my colleague ;-)) think that this network doesn’t even allow your host to VMConnect to your VMs, that is not true. But you can’t access the VMs through your network, even from the host)
-         Internal
This network is similar to private virtual network, since it does not bound to a physical NIC adapter.
But the difference is that the internal network allows communication between the host and the VMs,
So you can communicate from your host to the VMs, between VMs, and from VMs to host.
So, since it`s so easy to create virtual networks, people seems to forget that networking on the virtual layer, have some similarities to a physical network.
That means that you have to ‘patch’ your VMs properly as well.
If you want to create two external virtual networks with different subnets and have communication between them, you would still need a default gateway configured on your VMs.
Even though the VMs is located on the same disk on the parent/shared storage, there would be no communication without a gateway and a routing between those subnets J

Thursday, October 7, 2010

Important registry setting in Windows Server 2008 R2 SP1

Since SP1 supports ‘Dynamic Memory’, your VMs could consume almost all available memory on the host, and leave 'nothing' for the parent partition.
A new registry key is now available:
HKEY_LOCAL_MACHINE\Software\Microsoft\Windows NT\CurrentVersion\Virtualization
REG_DWORD value
Name = MemoryReserve
Setting= amount of MB to reserve for the parent partition (recommend minimum 2GB)
You have to reboot your host to let the changes take effect.

Virtual vs. Physical (Part one)

First thing first: It`s not a secret that I`m a fan of Microsoft`s solutions, especially
when it comes to virtualization and Hyper-V. I enjoy spending time with
virtualization and testing, to find solutions that are out of the box.
Virtualization changed the work day for the IT-pros, and I will share some thoughts about what
I consider as advantages compared to physical machines.
Hardware:
In a virtual environment, there is no problem to add additional hw.
CPU, memory, controllers, NICs and disk. Everything is possible to add in few seconds. Some of the hw can also be added on the fly, while the VMs is still running. The ability to this does not require physical presence of your IT-staff, but can be managed remotely.
Compared to a physical machine, you most often have to shut down your machine, take it
out of the rack, insert the hw, and check that it is functional. That does require physical presence unless you have sticky fingers.
Backup/Snapshots:
“After all, VMs is nothing but a set of files in a folder”. With that statement, it is
easy to imagine the backup and restore scenario for this design, compared to physical servers.
It requires storages, - yes. But also backup of physical servers require storage.
With the snapshot feature, you can save the state of the VMs in case you need to restore it later. (Installing patches, applications, and so on). But there are some consideration with snapshots as well.
Administration & Management:
This is my favorite. The ability to move your VMs, clone VMs, deploy new VMs and much more, make the work day much more pleasant. Off course you`ll need sufficient hw to be able to perform all this.
(With 2008 R2 SP1,you are now able to use dynamic memory for your VMs. That means that the RAM your VMs allocate from the parent, don’t have to be more than necessary to be able to start your VMs. Off course, you can set an upper limit as well.)
With 2008 R2, you are able to use CSV (Clustered Shared Volumes), so the Hyper-V nodes can share volumes in Failover Cluster. That gives you the possibility to perform Live Migration without downtime for you VMs.

Tuesday, October 5, 2010

How to make your existing VMs Highly Available

While I was waiting for my storage to be ready for clustering, I had to explain some of my colleagues how we should move the existing VMs over to the clustered shared volume.

If you have enabled CSV before, you may remember that you are getting an informational
message that mention that the CSV should ONLY be used for and by Hyper-V. Off
course, that makes sense.

But that does not mean that you can`t browse, or explore the folders.

There are several ways to get your VMs into your Failover Cluster and make them Highly Available.
We are going to take a look at some examples here:

Example 1:
First thing to do, is to shut down your VMs that you want to move over to your Failover Cluster.
When the VMs are shut down, you are able to use the ‘Export’ function in Hyper-V manager. This operation fetch all the .vhd files, configuration, snapshots, and so on, and put it in the destination folder. The folder should be located in C:\ClusterStorage\Volume1. After the export is finished, you simply import the machine into Hyper-V from that location. (Remember to mark the ‘copy the virtual machine (create a new unique ID)’ option before import, since the VM you`re importing already exist in Hyper-V manager).
Now, let’s make this a HA VM.
In Failover Cluster Manager, right click Services and Applications , select ‘Configure
a Service or Application..’ Here, you select ‘Virtual Machine’,  and in next window, you select the VM you just imported. (Remember that the VM should be turned off during this operation).
You have now made your VM Highly Available in Failover Clustering.
After you have checked the HA VM, you can delete the source VM from your DAS.

Example 2:
Shut down your VM, and copy the configuration, and virtual hard disks to a folder on c:\ClusterStorage\Volume1.
Now, let’s make this a HA VM.
In Failover Cluster Manager, right click Services and Applications, select ‘Virtual MachineàNew
Virtual Machine
à and the Host you want to create this on.
Here you have to specify the configuration file, and the vhd-files you want to attach to your vm.
Once this is done, you have made your VM Highly Available in Failover Clustering.

Example 3:
In this example, we have to mention the System Center Virtual Machine Manager 2008 R2.
This is a fantastic tool that helps you to manage your virtual environments, end to end.
Find the VM that is located on your host, right click, and select ‘Migrate’.
You will be prompted to make this VM High Available. Select ‘Yes’, and in the next window, you are able to specify the path for this VM on you clustered shared storage.
This process is similar to Example 1, with the export/import function.
You have now made your VM Highly Available.

Friday, October 1, 2010

New Hyper-V LAB !

Finally I got all the required hardware for my new Hyper-V lab. My students are thrilled, and so am I.
Two identical servers from Supermicro, 3 switches, QNap Turbo NAS with ISCSI target and we`re on.
Since the creation of my iscsi target is taking about 48 hours, I`ll have to wait to set up my CSV`s.
But I`ve already some running VMs on my hosts, that I`ll have to migrate to my cluster.
I will show you 'how to' in my next post on this blog.